I began by stamping the yeti image from the Get Yeti set with Versafine Onyx Black ink on to a piece of white cardstock, and then coloured him in using some ZIG Clean Color Real Brush Pens.
I then fussy-cut him out and set him aside to work on my card base. I laid down the Geometric Circles stencil onto a white card base and roughly passed some embossing paste through it onto the surface. I lifted the stencil away to reveal the lovely pattern and before the embossing paste dried, I quickly flicked some gold paint onto the card base for some added interest.
I stamped a sentiment from So Many Sentiments onto a strip of black cardstock, and foam mounted it and the yeti to the card front.
Happy Saturday everyone, I hope you are doing well. It's Bibi Cameron here and today I'm sharing a Mother's day card and a video featuring 4 beautiful products by Neat and Tangled:
My card for today might seem very clean and simple but there is a lot to share about it ...
My video is filled with tips and a couple of techniques using a " DIY fabric shim" for die cutting, and now also for stamping and colouring
Have a look...
Since I made my first video about the "DIY fabric shim" here, I have been using it a lot. It is incredible how something so simple, inexpensive and so easy to make can make such amazing contribution to my work.
I hope you like the card, the video, my tips and the fabric shim idea.
It's the last Friday of the month which means, sadly, we have to say goodbye to this month's guest designer Cathy Zielske. Cathy's projects this month have been such a treat and today's project is no different. She's featuring our Geometric Circles cover plate and Awesome dies. Here's Cathy with all the details:
Today I'm sharing my third and final card as the guest designer for Neat & Tangled. And today's card is kind of special. It's the, how does one say, pièce de résistance? But specifically, it is my ode to the one and only Laura Bassen, one of my true card making idols and all around card magician.
You see, a long time ago, (okay, last year…), Laura made an amazing card you see below using a Neat & Tangled cover plate and she posted about it here.
I went nuts for the card. Ordered all the supplies. Tried my best to emulate the master but it ended up being a hot mess so instead, I dialed it down just a bit and created a card you see on this post. (Oh, I was so young and green!)
But I always wanted to tackle the technique that Laura used and for this card, I finally managed to achieve the result I was looking for.
Only one problem: on the video you're about to see, a handful of clips are missing that show me actually DOING the technique. But I thought I'd keep the video anyway because the result was so good! And yes, to really learn the technique, just go watch Laura's video here.
Without further ado, here is my video, missing clips and all!
Hi there! It's Keeway joining with you today in a happy, happy cardmaking session to make a fun birthday card! If there's any card I send out the most, it's birthday cards, so I definitely like to keep the stocked at all times. In our recent April Release, these adorable elephants in the Mommy, Daddy, and Me set, are not only great for your mother's and father's day cards, but can easily be transformed for any other occasion. Today, I'll be using them to create a fun birthday card.
I always start by stamping my images in hybrid ink (copic friendly) and coloring them up with copic markers. Then, I die cut them with the coordinating dies and set them aside. My elephants are from the Mommy, Daddy, and Me set, and the balloon came frrom the Little Monster set.
I die cut the background out of an A2-sized frame.
Then, I grabbed a birthday sentiment from the So Many Sentiments stamp set and heat embossed it in white onto black cardstock. I used the fishtail die from the Classic Tag 2 die set to die cut the sentiment out. Finally, I adhered all the various pieces to the blended background with foam tape. All done! Have a happy, happy day!
Daria here. So glad you are joining us today. For today's project, I've been playing with heat-embossing on a dark cardstock, April Released Have Courage stamp and die sets, and with partial overlapped die-cutting.
I love that stamp set for the fact that it can be used to create so many different looks and in many different colors. Not only in greens. I especially like that it can be used to create a lace effect.
I love the look of gold heat embossing on dark navy cardstock. I think it looks very classy, while the white brings that soft touch to it.
I used partial die-cutting and also made it slightly overlapped to save all the intricate details of the dies. Here is a video to show you how it was done:
I hope you liked that simple ideas and will give them a try. Be sure to tag us in social media. It is always so rewarding to see what you create.
Hi crafty friends! It's Cheiron here with my monthly post. I've been doing a lot of spring cleaning in the studio and have realized that I have a lot of stamps that have not seen any love in a long time. Today I am working with some of my older Neat and Tangled stamps - On the Edge and Just Thinking of You to create a fun card with a colorful Distress Oxide background.
To create this fun background, I used my Tim Holtz travel stamp platform and stamped in a variety of colors to give my card a sort of vintage rainbow feel. It's not the usual traditional rainbow colors that I use, but I love the look of them in real life, they are so vibrant and almost look like they were gelli printed. I sprayed the entire stamped panel with a Distress Sprayer filled with water and blotted it with a paper towel. To finish the card, I added a heart that I inked with Distress Oxides and stamped with the sentiment from the Just Thinking of You stamp set and layered that heart onto a vellum heart and adhered it to the card. For the finishing touch, I added just a few Crystal Clear sequins.
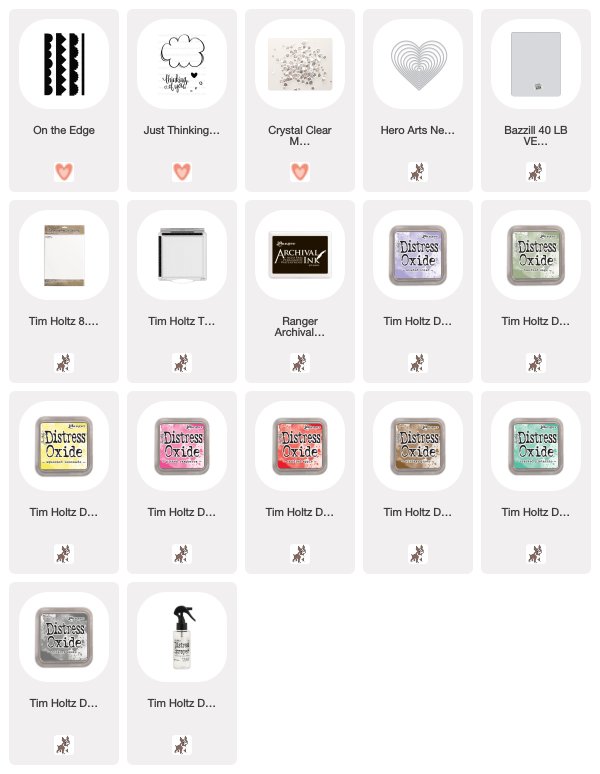
I hope this will inspire you to take out some of your old favorites and mix them with with newer products :) SUPPLIES:
I know many of you are familiar with Hedgehog Hollow, the blog of a supporter and friend of Neat & Tangled, Alexandra.
They have a very close friend, part of the Hedgehog Hollow team, whose daughter is dealing with some very serious health issues. In order to help, Hedgehog Hollow is offering some products for sale, the proceeds of which will help with medical costs. Below is the text from Alexandra's blog post. We encourage you all to read on and help if you're able.
Hi Hollowers!
We are so saddened at the Hollow that part of our Prickle family has had a devastating diagnosis. It takes lots of members of the family to keep the Hollow running, not all of whom you see on screen. One member keeps us running no matter what and keeps your boxes rolling out without a hitch, she has the most amazing daughter who Maddi is great friends with and you have seen them needle felting together, during spring break they were inseparable! It is with a heavy heart we found out on Friday she had a tumor in her stomach and needs a lot of treatment. We are all praying for our friend for a full and speedy recovery, all proceeds from this Crafting for a Cure series of two word dies and stamp set will go to the family to support in medical costs and for a donation to the hospital or other charity of their choosing.
We appreciate you purchasing these products to support Akron Children’s who do an amazing job, every member of the Hollow is part of the family and we all wish we could do more to help her. Please keep them in your thoughts and prayers.
It’s easy to feel helpless at a time like this, Maddi has created the most wonderful care package for her, it’s touching how much care she has put into picking out each thing by hand, choosing things she thinks she will enjoy at each stage fo recovery. You can shop for the stamps and dies by clicking here; every penny makes a huge difference. Our Maddi has also spent alot of time in the children’s hospital for many reasons and so this cause is not only close to our heart because she is part of the Hollow family but also we know how wrenching it is to have your baby in hospital, you would give anything to swap places with them.
Thank you again for all your love, prayers and support.
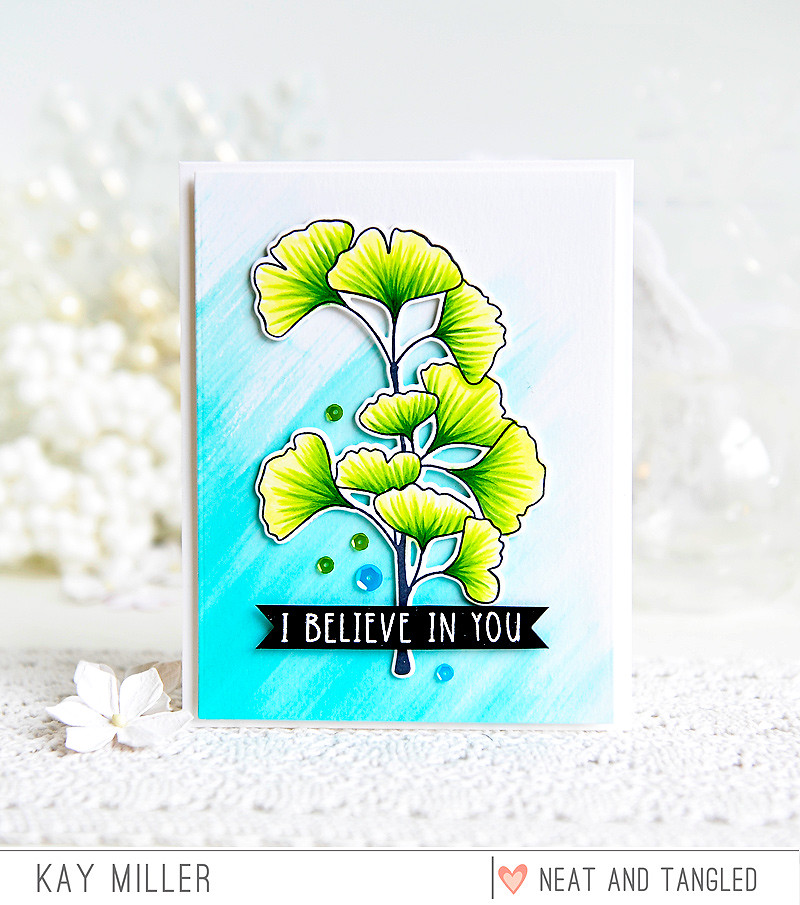
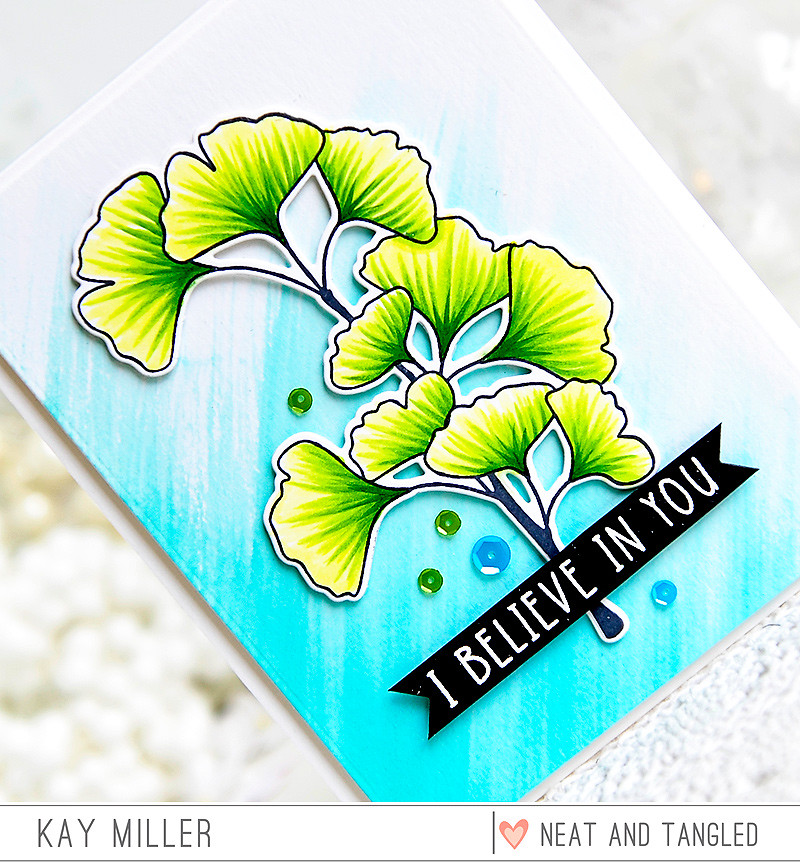
Hi there! Kay here today and I have a card to share with you today featuring the beautiful Have Courage stamp set and Coordinating dies, from the Neat & Tangled April Release.
For the background I used Peerless watercolors and a large watercolor brush. I just took the brush and swiped my paint up from the bottom left corner. I didn't wet the paper first, it was more of a dry brush stroke and super easy to do. I then colored the beautiful ginkgo image with Copic markers and cut it out with the coordinating die. I trimmed the background down to 5.25x 4 and mounted this to an A2 top folded white card base with foam tape.
I then adhered the gingko image with foam tape as well. I heat embossed the sentiment with white embossing powder on black card stock, cut it out with the banner die from the Scalloped dies and added that across the bottom of the gingko with foam tape. I added a few sequins from the Peacock Feathers sequin mix to finish it up! I hope you have enjoyed my card today! Thanks so much for stopping by! Hugs, Kay :)
Hello everyone, it is Bibi Cameron here. I have been inspired by the stunning Cover Plate Dies by Neat and Tangled and today I'm sharing a super fun card making video - technique to transfer large intricate die cuts to a card panel in record time.
After experimenting for a while with large die cuts, I nailed it! Yay.
I'm using fabric and a temporary -repositionable spray adhesive to easily manipulate die cuts and as an image is worth thousand words I urge to watch the video to see the demonstration with details.
Hi friends! We're having a flash sale, now through Sunday featuring our Medallion Flower Builder stamps and dies. These versatile stamps and dies can be used in so many ways to create the most beautiful patterns and designs. Here are just some of the ways they can be utilized:
Feeling inspired? We are too! This sale is only good through Sunday and only while supplies last! Hope you are able to take advantage!
Happy Friday friends! Our April guest designer, Cathy Zielske, is back with us today sharing he second project of the month. We're loving this sweet, CAS card! Here's Cathy with all the details:
I'm so happy to be back today as a guest designer for Neat & Tangled, and I'm excited to share my second card project of the month with you. I'm using the charming Friendly Florals stamps and coordinating dies, along with some simple stamping and embossing, and some Zig Clean Color Real Brush marker coloring.
I adore the sweet blooms in this set and I knew I wanted to use my Zig markers to create a watercolor look and feel. But because my watercolor skills are developing, I decided to stamp my images and emboss them with clear powder to create a border that would contain my ink. I find it much easier to paint when there are raised outlines, which is what the embossing provides.
I stamped using Versafine ink and embossed with clear powder for that raised shine you can see in the image above.
I did the same process for the sentiment, to create a matching shiny black finish. Here's a video of the entire card process!
Thanks so much to Neat & Tangled for having me and I'll be back next Friday with my final card project for the month!
Hello friends, it's Natalie here today and I've got lots I want to share! This is a sort of "sit-down and grab-a-cuppa" kind of post because once I started thinking about all the ways you can use your collection of Cover Plate Dies I came up with quite a long list! And that means my accompanying video which demonstrates all the techniques has become kinda long too ;-)
Disclaimer: Some of the cards you'll see today you may recognise because I've shared them before, but I'm using them as examples of the techniques I'm discussing. However, I did also make 3 new cards just for this post, so there's plenty of fresh inspiration for you too! I hope that's ok?
Ultimately I thought of 7 different ways to use Cover Plate Dies, and I want to share them with you today. Of course, I don't imagine the list is complete by a long shot. I'm sure there are a million more ways to use your Cover Plate Dies as well (and if you've got one I would LOVE to hear it!) But here's the first 7 that I thought of....
1. Background Texture
This is probably the most common way I tend to use my Cover Plate Dies, and one of my favourite techniques. It's all about using your die to cut your background panel, and then piecing it back together again so that it becomes a subtle hint of pattern and texture without overwhelming the focal point of the card. There are multiple ways of achieving this easily, and I'll demonstrate my technique in the video at the bottom of this post.
To make the card on the left I've used the 'Squares and Chevrons' die with just plain white cardstock. I love the white-on-white look which gives me plenty of opportunity to go BOLD and BRIGHT with the rest of the elements on the card.
The card on the right features the 'Inlaid Squares' die, but this time I cut my background panel out of patterned paper. I think it creates an extra point of interest in the background but it doesn't distract you from the main features of the card.
2. Patterned Paper Patchwork
This is a similar technique to the first one, except this time I cut multiple sheets of different coloured patterned paper with the Cover Plate Die and then mixed and matched them as I pieced them back together. It reminds me of patchwork or quilting techniques.
This set of 3 sympathy cards were created with the 'Squares and Chevrons' die and 3 different patterned papers. One of the great advantages of this technique is that you can create multiple versions of the same background with all the pieces you'll have. If you use 3 papers, then you've got enough to create 3 backgrounds. If you use 4 papers then you could create 4. It's a great way of making cards in bulk. Now I say 'background', but I think most of the time this kind of technique is pretty enough to stand on it's own, and only needs a simple sentiment to finish it off.
In the video below I'm going to share with you how I created this card with the 'Succulent' Cover Plate Die. It might look like I've used a different technique because this cover plate isn't a pattern, and I've only used 2 colours of paper, but it's the same principles of Patterned Paper Patchwork in action!
3. Create Your Own Patterns
The Congratulations card on the right has an eye-catching black and white patterned paper, or so it seems at first glance. In fact, what I've done is take the square pieces that are cut out when you use the 'Inlaid Squares' die and adhered them to white cardstock in my own pattern (granted, it's very similar to the intended design of the die in the first place.... but not quite! LOL!)
Certainly you could be more adventurous in your own arrangement!
4. Negative Pieces as a Feature Embellishment
Since I have a hard time letting anything go to waste, I then used the remaining smaller black squares from the same pass of the 'Inlaid Squares' die and scattered them across my Happy Birthday card (above) in a slightly more haphazard way. What I'm attempting to do here is use the negative pieces - the bits that 'pop out' of the diecut - as a focal point on the card.
Some of the other Cover Plate Dies are even more aptly suited to this purpose. Take the 'Warm Winter Scene' die for example....
The trees and houses that it cuts are purposely designed to be used as embellishments in their own right. But don't ignore the positive piece that's left behind - that grid of house and tree-shaped holes is definitely worth using for other projects. Which brings me to an example for my very next technique...
5. As a Window Frame
I'm not sure if that's really the right term for it, but let me just explain what I mean!
What I'm referring to is the use of the positive image - that's the bit that's left behind when you've popped out all the other pieces, and which is usually the main point of the die - as a top layer to a dimensional project. The best example of this is to create a shaker card!
On this card I used the 'Warm Winter Scene' diecut, backed it with clear plastic, mounted that onto some foam (for the dimension) and filled in all the windows with sequins.
But you could opt for a much more 'simple' approach and layer your positive diecut image over the top of patterned paper, or an ink-blended sunset, or an alcohol-ink galaxy, or some other brightly coloured layer. The depth this creates is what reminds me of it being like a window frame, with you looking through the windows to the world beyond.
6. As an Embossing Plate
Did you know you can turn any of your traditional dies into embossing plates with the addition of a sheet of rubber or silicone? This is the perfect technique for Cover Plate dies with their repetitive patterns. You need to buy the rubber sheets separately (many of the diecutting brands such as Sizzix, Spellbinders, Cuttlebug etc have their own specific versions, but you can also buy more generic 'embossing kits' from other manufacturers) and when you use these as part of your sandwhich of die, paper and cutting plates it will stop the die from cutting, and only leave an embossed impression on your paper instead.
For some reason I completely failed to take a photo of the embossed backgrounds I created using this technique, although I do demonstrate it in the video, so go and watch that for more details! However, I do have this card where I use this same technique with the 'Lucky Stars' die - and even though it's not a Cover Plate die you get the idea right?! :-)
7. Create Your Own Stencils
The last idea I wanted to share today is how you can use your Cover Plate dies to make your own set of stencils! Again, you can purchase specific stencil film for this intended purpose (Sizzix has just released their version for example), but I find if you're ok with a little bit of fuzziness around the edges that some normal cardstock will do the trick in a pinch.
On the card above I used the 'Falling Circles' die and cut it out using some scrap cardstock. Then I simply sponged mint ink through the holes to give the impression of falling snow. In the video I use the same 'stencil' with multiple bright colours of ink to instead give the impression of falling confetti! So you can see it's a fun technique with many uses.
And now... to demonstrate all these techniques and to share some examples I've put it all together in video form as well. So sit back and enjoy!
Oh, and don't forget to leave your comments with all the other ways you've been using Cover Plate Dies in your own makes! Share your ideas and link your projects because I would LOVE to see!


